How to Install a Bidet: Complete Step-by-Step Guide 2026
By the BidetLabs team | June 2026 | 10 min read
Installing a bidet is one of the simplest home upgrades you can make. No plumber required, no special skills, no drilling. A standard bidet attachment takes 15 to 20 minutes to install, and an electric bidet seat takes 25 to 30 minutes. The BidetLabs team has installed dozens of bidets across every major brand and this guide covers every step.
Before You Start
Check that your toilet has a standard shut-off valve behind or beside the base. Check that your toilet seat uses two standard bolt holes. Most toilets in the US do. If you have a French curve or unusual one-piece toilet, verify compatibility with your chosen bidet before purchasing.
What You Need
- Your bidet (the package includes all necessary hardware for most brands)
- An adjustable wrench
- A small towel or bucket for drips
- 5 to 10 minutes of prep time, 10 to 15 minutes for installation
That is genuinely the complete list for a cold water bidet attachment. No glue, no pipe cutting, no soldering. The T-valve connection that comes with every bidet attachment is a standard plumbing fitting that threads onto your existing supply line.
Part 1: How to Install a Bidet Attachment
A bidet attachment is the simplest and least expensive type of bidet. It sits between your toilet bowl and your existing seat, with a nozzle that extends toward the bowl when you use it. The Luxe Bidet Neo 120 at $33.99 and the TUSHY Classic 3.0 at $129 are the two most popular options in this category.
Step 1: Turn Off the Water Supply
Locate the shut-off valve on the wall or floor behind your toilet. Turn it clockwise until it stops. This cuts water to the tank. Then flush once to drain the remaining water from the tank.
Step 2: Disconnect the Supply Hose
Unscrew the supply hose from the bottom of the toilet tank (the fill valve connection). Have a towel ready - a small amount of residual water will drain out. You can leave the other end of the hose connected to the shut-off valve for now.
Step 3: Install the T-Valve
Thread the T-valve (included with your bidet) onto the fill valve at the bottom of the tank where the supply hose was connected. Hand-tighten, then snug with a wrench - do not overtighten. Now reconnect your original supply hose to the bottom port of the T-valve. The side port is where your bidet hose will connect in a later step.
Step 4: Remove the Toilet Seat
Open the plastic caps at the back of the toilet seat (they snap or slide off). Unscrew the bolts underneath - usually by hand or with a screwdriver. Lift the seat off and set it aside. You will reinstall it over the bidet attachment in a moment.
Step 5: Position the Bidet Attachment
Slide the bidet's mounting plate over the toilet's bolt holes, aligning it so the nozzle points toward the center of the bowl. The plate slots in from the back of the toilet and sits flat on the bowl rim. The hose connection port should face toward the wall where the supply line is.
Step 6: Reinstall the Toilet Seat
Place your toilet seat back on top of the bidet mounting plate, aligning the seat bolts with the bolt holes through the attachment. Thread the bolts back in and tighten. The bidet attachment should feel stable and not shift when you sit.
Step 7: Connect the Bidet Hose
Connect one end of the bidet hose (included) to the side port of the T-valve and the other end to the inlet on the bidet attachment. Both ends are standard threaded fittings. Hand-tighten, then snug with a wrench.
Step 8: Turn the Water Back On and Test
Open the shut-off valve slowly (counterclockwise). Watch all three connection points: the shut-off valve to supply hose, the T-valve top and bottom, and the bidet inlet connection. If any connection drips, hand-tighten slightly more. Once dry, test the bidet spray using the control dial.
Installation Tip
If the nozzle position does not feel right after testing, most bidet attachments allow you to slide the mounting plate forward or backward slightly before fully tightening. Adjust until the spray is centered on the bowl.
Recommended Bidet Attachments
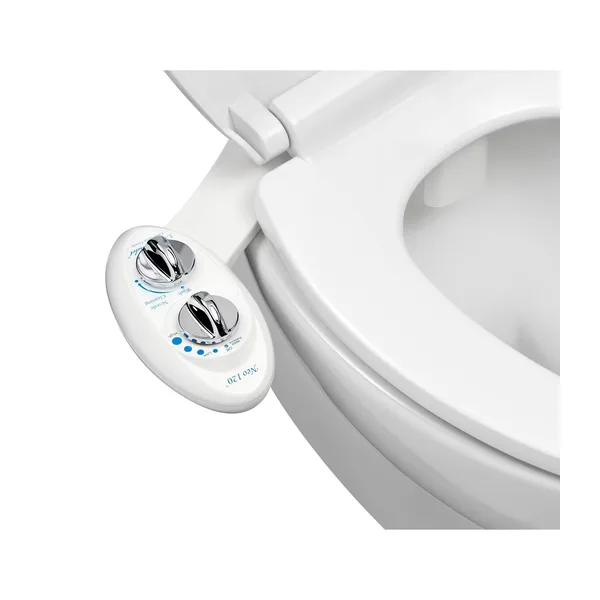
Non-electric bidet attachment. Cold water. Adjustable nozzle. Self-cleaning. The easiest install on the market - most people finish in under 15 minutes.
$33.99
Check Price on Amazon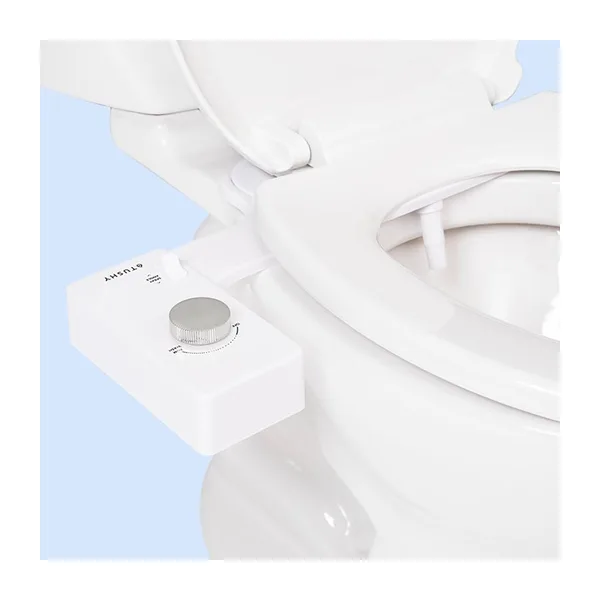
Non-electric bidet attachment with adjustable water pressure and angle control. Stylish design, simple installation, and a strong cult following. Cold water only unless connected to a warm water adapter.
$129
Check Price on AmazonPart 2: How to Install an Electric Bidet Seat
An electric bidet seat replaces your entire toilet seat and plugs into a standard outlet. It provides warm water, a heated seat, a warm air dryer, and often a remote or side panel control. The TOTO Washlet C5 at $410 and the Brondell Swash SE400 at $279.99 are two of the most installed electric seats in the US.
The water connection steps are identical to a bidet attachment (Steps 1 to 3 and 7 to 8 above). The difference is the seat replacement process:
Step 1-3: Water Connection
Follow the same T-valve installation as described in Part 1. Turn off the water, disconnect the supply hose, install the T-valve, and reconnect the supply hose to the T-valve bottom port.
Step 4: Remove Your Existing Toilet Seat
Pop the bolt covers, unscrew the seat bolts, and lift off the old seat completely. Both the seat and lid come off as one unit.
Step 5: Install the Bidet Seat Mounting Plate
Most electric seats use a quick-release mounting plate that bolts to your toilet's existing seat holes. Align the plate, thread the bolts, and tighten. The seat then slides or clicks onto this plate and can be removed for cleaning.
Step 6: Connect the Water Supply Hose
Connect the bidet seat's water supply hose from the side port of the T-valve to the inlet on the seat itself. The inlet is typically on the left rear of the seat. Hand-tighten and snug with a wrench.
Step 7: Plug In and Turn On the Water
Plug the power cord into a grounded outlet near the toilet. If your bathroom does not have an outlet near the toilet, a GFCI outlet can be installed by an electrician, or you can use an extension cord rated for bathroom use. Turn the water back on, check for leaks, and follow the seat's first-use setup on the remote or control panel.
Outlet Requirement
Electric bidet seats require a grounded 120V outlet within reach of the toilet. If your bathroom does not have one nearby, factor in the cost of an electrician before purchasing. Many older bathrooms only have an outlet above the vanity, which is too far from the toilet for most seats' power cords.
Recommended Electric Bidet Seats
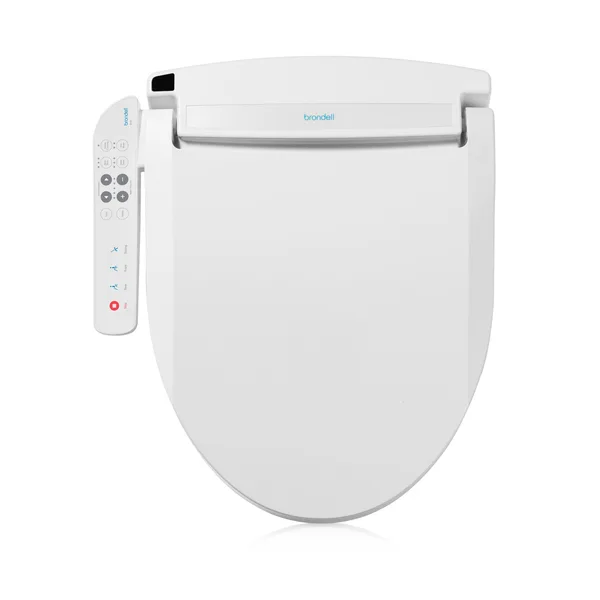
Electric bidet seat with warm water, heated seat, warm air dryer, and remote control. One of the easiest electric seats to install with clear illustrated instructions. Fits round and elongated bowls.
$279.99
Check Price on Amazon
TOTO's best-selling mid-range bidet seat. Warm water, heated seat, air deodorizer, remote control, and TOTO's eWater+ technology for self-cleaning. Backed by TOTO's trusted reputation for build quality.
$410
Check Price on AmazonPart 3: How to Install a Handheld Bidet Sprayer
A handheld bidet sprayer is the simplest installation of all. It is essentially a kitchen-style spray nozzle on a hose that connects to your toilet's water supply. The Greenco Fresh Water Spray at $44.54 is a popular option.
The process: shut off the water, install the T-valve (same as Steps 1 to 3 above), then connect the sprayer hose to the T-valve side port. Mount the sprayer holder on the side of the tank or toilet using the included adhesive bracket or screw mount. Turn the water back on and test. Total time: under 10 minutes.
Common Installation Questions
What if my connections drip after I turn the water back on?
A drip at a threaded connection almost always means it needs one more quarter-turn with a wrench. Turn off the water, dry the fitting, tighten slightly, and re-test. Do not overtighten - plastic fittings can crack. If a drip continues after tightening, the threads may not be aligned. Unscrew, re-seat the threads, and tighten again by hand before using a wrench.
My toilet does not have a shut-off valve. What do I do?
You will need to shut off water at the main supply valve for the house, then install an inline shut-off valve on the supply line to the toilet before proceeding. This is a simple addition and most hardware stores carry the parts for under $15. If you are not comfortable with this step, it is worth a 30-minute call from a plumber.
Can I install a bidet on a one-piece toilet?
Yes, with most bidets. One-piece toilets sometimes have slightly different seat bolt placement. Check your bidet's compatibility list before purchasing. The TUSHY Classic 3.0 and Luxe Neo 120 both include elongated and round bowl mounting hardware and fit most one-piece designs.
Frequently Asked Questions
How long does it take to install a bidet?
A bidet attachment like the Luxe Neo 120 or TUSHY Classic 3.0 takes 15 to 20 minutes. An electric bidet seat like the TOTO C5 takes 25 to 30 minutes. No plumber required for either.
Do you need a plumber to install a bidet?
No. A T-valve connection to your toilet's supply line requires no plumbing skills. The only time you need a plumber is if your toilet has no shut-off valve (rare) or if you need a new electrical outlet for an electric seat.
What is the easiest bidet to install?
The Luxe Bidet Neo 120 at $33.99 is consistently rated the easiest bidet to install. The included hardware is comprehensive and the instructions are clear. Most buyers finish in under 15 minutes on their first attempt.
Can you install a bidet on any toilet?
Most bidets fit standard round and elongated toilets. French curve, some one-piece, and unusual skirted designs may need a specific model. Always verify compatibility with your toilet shape before purchasing.