Quick Answer
Installing a bidet attachment takes about 10–15 minutes, requires no special tools, and needs no plumbing experience. You'll remove your old seat, attach the bidet plate, reconnect the water supply T-valve, and you're done.
How to Install a Bidet Attachment: Step-by-Step Guide (2026)
Last updated: March 2026
What You'll Need
- The bidet attachment kit (should include T-valve and washers)
- Adjustable wrench (optional but helpful)
- Teflon tape (optional but recommended)
- Clean towel (for any minor water spills)
Step-by-Step Installation
- Turn off the water supply: Locate the shutoff valve behind or beside your toilet and turn it clockwise until tight.
- Flush the toilet: This empties the tank and water line.
- Remove your existing toilet seat: Use a screwdriver to loosen the bolts underneath the seat.
- Install the bidet mounting plate: Place it where your toilet seat was, using the same bolts.
- Attach the T-valve: Remove the existing water supply line from the toilet, wrap threads with Teflon tape, then connect the T-valve.
- Reconnect water lines: Attach one side of the T-valve to the toilet and the other to the bidet.
- Turn water back on: Slowly turn the shutoff valve counterclockwise.
- Check for leaks: Look at all connections while flushing the toilet.
- Adjust spray position: Sit on the toilet and adjust the nozzle to the correct position.
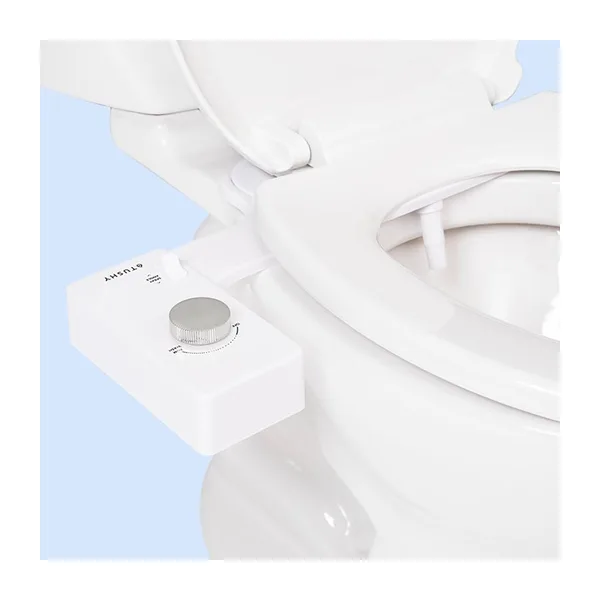
Recommended Bidet for Easy Installation
The TUSHY Classic 3.0 is one of the easiest bidets to install, with clear instructions and all necessary parts included:
Check Price on AmazonToilet Compatibility: Check This Before You Buy
Most bidet attachments fit standard American toilets, but there are two things worth checking first. Toilet shape (elongated vs. round) matters - almost every attachment lists compatibility on the box, and most modern bidets ship with hardware for both. The second issue is seat clearance: if your toilet tank sits close to the seat, a thick bidet plate can push your seat forward, creating a gap at the back. The Bio Bidet SlimEdge at 5mm is the fix for this - standard attachments run 10–14mm and cause problems on compact toilets.
One-piece toilets with curved bowl profiles occasionally cause fitment problems. If you have a Kohler San Souci or a similarly contoured one-piece, check the manufacturer's compatibility list before installing. Most attachments list tested toilet models, and the TUSHY support page has the most comprehensive list we've found.
Adding Warm Water: The T-Valve Hot Water Hookup
Non-electric bidet attachments use cold water by default. To get warm water without buying an electric seat, you need a bidet with a warm water option (like the TUSHY Spa 3.0) and a longer supply hose that runs to your bathroom sink's hot water line. The TUSHY Spa ships with the hose. The trade-off is a visible hose running from your toilet to your sink, which some people find acceptable and others don't. If aesthetics matter, an electric bidet seat with an internal water heater is cleaner - the Brondell Swash SE400 at $199 is the lowest price for a truly self-contained warm water solution.
Common Mistakes to Avoid
- Forgetting to turn off the water supply first: You'll know immediately - but the water will be everywhere before you can react. Always do this step before touching any connections.
- Overtightening the T-valve: Hand-tight plus a quarter turn is enough. Going further can crack the porcelain inlet on the toilet tank, which means a plumber call and a new tank lid at minimum.
- Skipping Teflon tape: The T-valve threads are standard NPT threading. Without tape, slow seeps at the connection are common. Three wraps of tape, clockwise around the male threads, prevents this entirely.
- Not checking for leaks before cleaning up: Turn the water back on slowly, let it fill for a full flush cycle, and watch all three connection points for 60 seconds. A dry paper towel pressed against each joint will show any moisture immediately.
Troubleshooting: What to Do When Something Doesn't Work
The three most common post-install problems, and how to fix each one:
Slow drip at the T-valve connection: Disassemble, add another two wraps of Teflon tape, and reinstall. This fixes 90% of slow leak issues. If the drip continues, the washer inside the connection may be missing - check the installation kit for a small rubber washer that sits inside the coupling nut.
Bidet plate moves when you sit: The mounting bolts aren't tight enough, or the plastic wing nuts loosened during installation. Open the toilet seat fully, locate the adjustment bolts underneath, and retighten. On most attachments, there's a plastic tab you push to lock the plate - make sure it's engaged before declaring the install done.
Water pressure is too low: The shutoff valve behind the toilet may only be partially open. Turn it fully counterclockwise. If pressure is still weak, the T-valve may have a debris screen that caught particles during installation - unscrew it and rinse under the faucet.
First Use: What to Expect
The spray position won't be perfect the first time - that's normal. Most bidet attachments have a nozzle position adjustment that shifts the spray slightly forward or back. Make small adjustments over the first few uses until it aligns correctly for your anatomy. The adjustment knob or slider is usually labeled and takes a quarter-turn to move the position meaningfully.
Water pressure will feel unfamiliar. Start at the lowest setting, which is enough for effective cleaning, and only increase if needed. Many people find they prefer lower pressure permanently - it's not less effective, just less startling. Within a week, the routine becomes automatic and the install process that seemed intimidating will feel like it was nothing.